> ## Documentation Index
> Fetch the complete documentation index at: https://docs.odigos.io/llms.txt
> Use this file to discover all available pages before exploring further.
# Enable continuous profiling
> Enable the VM Agent eBPF profiling pipeline, add sources, and export profiles to Pyroscope.
This guide walks you through enabling the eBPF profiling pipeline on a host, and adding a destination that accepts OTLP profiles.
## Step 1: Enable the profiling pipeline
Turn on the eBPF profiles pipeline on **odigos-otelcol**. You can use `odictl` or edit `/etc/odigos-vmagent/config.yaml` directly.
```shell theme={null}
odictl
```
Press c to open the Configuration Editor, then navigate to **Profiling**.
Set **profiling.enabled** to `true` and press Ctrl+S to save. The collector reloads automatically.
Add to `/etc/odigos-vmagent/config.yaml`:
```yaml theme={null}
profiling:
enabled: true
```
## Step 2: Enable sources for the workloads you want to profile
Profiling only retains samples for **enabled sources**. Open `odictl`, focus the **Sources** pane (press `o`), and instrument the services you want sampled. The screenshot below shows the demo workloads enabled (`Instrumented`) alongside other host processes that stay untouched (`Not Instrumented`).
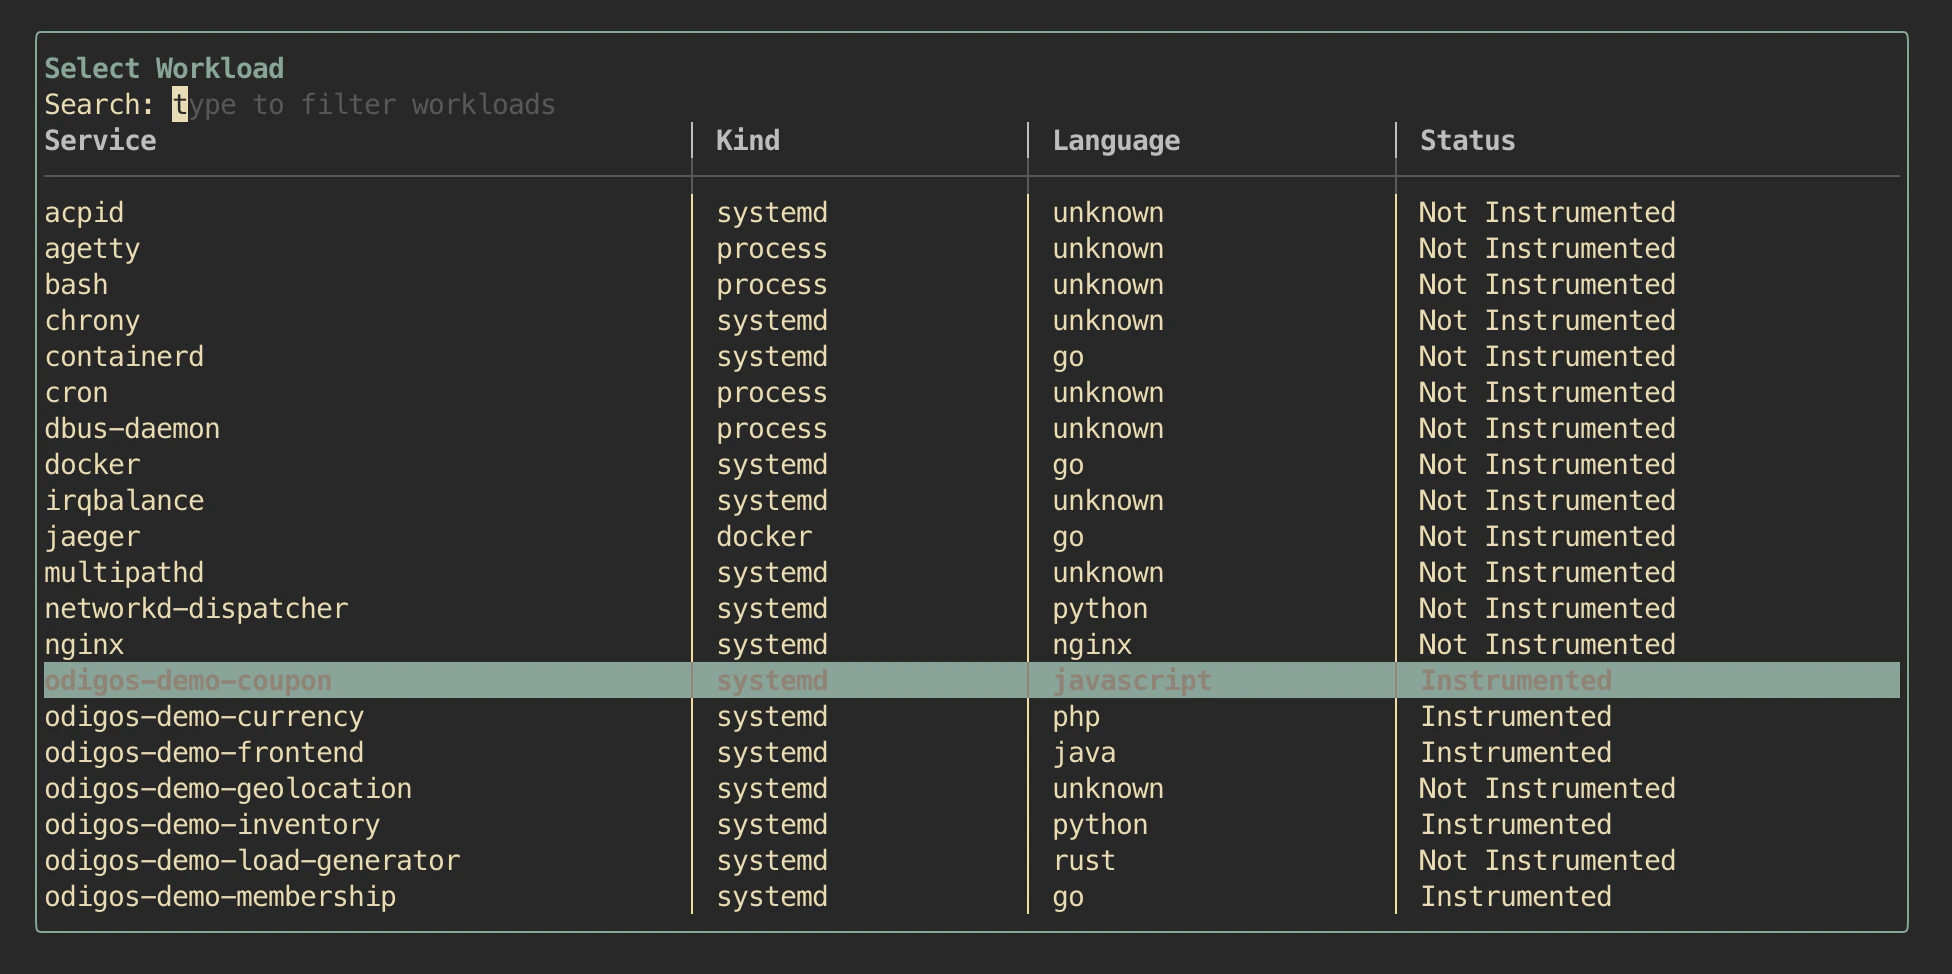 See [Sources](../../setup/configuration/add-sources) for the full walkthrough (TUI and YAML).
Toggling a source on or off takes effect within seconds — no vm-agent restart is needed. The collector keeps streaming profiles, but only samples for currently-enabled PIDs are exported.
## Step 3: Add a destination that accepts PROFILES
Open **Destinations → + Add Destination** and search for **profiles**. Any destination whose **Signals** column includes `PROFILES` or they accept OTLP Profiles signal works.
See [Sources](../../setup/configuration/add-sources) for the full walkthrough (TUI and YAML).
Toggling a source on or off takes effect within seconds — no vm-agent restart is needed. The collector keeps streaming profiles, but only samples for currently-enabled PIDs are exported.
## Step 3: Add a destination that accepts PROFILES
Open **Destinations → + Add Destination** and search for **profiles**. Any destination whose **Signals** column includes `PROFILES` or they accept OTLP Profiles signal works.
 As an example for step-by-step Pyroscope configuration, jump to [Export to Pyroscope](./export-pyroscope). For any other OTLP Profiles backend (e.g. `otlp` or `otlphttp`), follow the standard [Add destinations](../../setup/configuration/add-destinations).
## Step 4: View profiles in the destination
Open your destination's UI and you should be able to access the application profiles collected.
eg in Pyroscope, select profile type **`process_cpu`** and filter by **`service.name`** values that match your sources. See [Export to Pyroscope → View profiles](./export-pyroscope#view-profiles) for detailed example.
## Getting Help
If you have any issues, or require our assistance, please open an issue in [GitHub](https://github.com/odigos-io/odigos), or reach out to us in [Odigos Slack](https://join.slack.com/t/odigos/shared_invite/zt-24u91yknm-0fLXu6qnqYfNHS_GSUgTJw)
As an example for step-by-step Pyroscope configuration, jump to [Export to Pyroscope](./export-pyroscope). For any other OTLP Profiles backend (e.g. `otlp` or `otlphttp`), follow the standard [Add destinations](../../setup/configuration/add-destinations).
## Step 4: View profiles in the destination
Open your destination's UI and you should be able to access the application profiles collected.
eg in Pyroscope, select profile type **`process_cpu`** and filter by **`service.name`** values that match your sources. See [Export to Pyroscope → View profiles](./export-pyroscope#view-profiles) for detailed example.
## Getting Help
If you have any issues, or require our assistance, please open an issue in [GitHub](https://github.com/odigos-io/odigos), or reach out to us in [Odigos Slack](https://join.slack.com/t/odigos/shared_invite/zt-24u91yknm-0fLXu6qnqYfNHS_GSUgTJw)