

Enable Cloud Connectors
before you add a connector.
Resource types
aws.ecs-cluster and aws.fargate-cluster are discovered for coverage today;
Odigos does not yet install a separate agent onto them. aws.fargate-task — an
individual Fargate service — is the ECS resource Odigos instruments directly.- Odigos-managed: The connector automatically applies and maintains the required changes.
- Self-managed: You maintain full control by provisioning through your own CloudFormation, CDK, or Terraform pipelines.
Add the connector
1
Open Add connector and choose AWS
In the Central UI, open Connections / Connectors and start Add connector. Choose AWS.
2
Choose access level
Choose how much access this connector should have. The UI shows an example IAM permissions policy for the level you pick. You will attach that policy when you create the IAM role or user in the next step.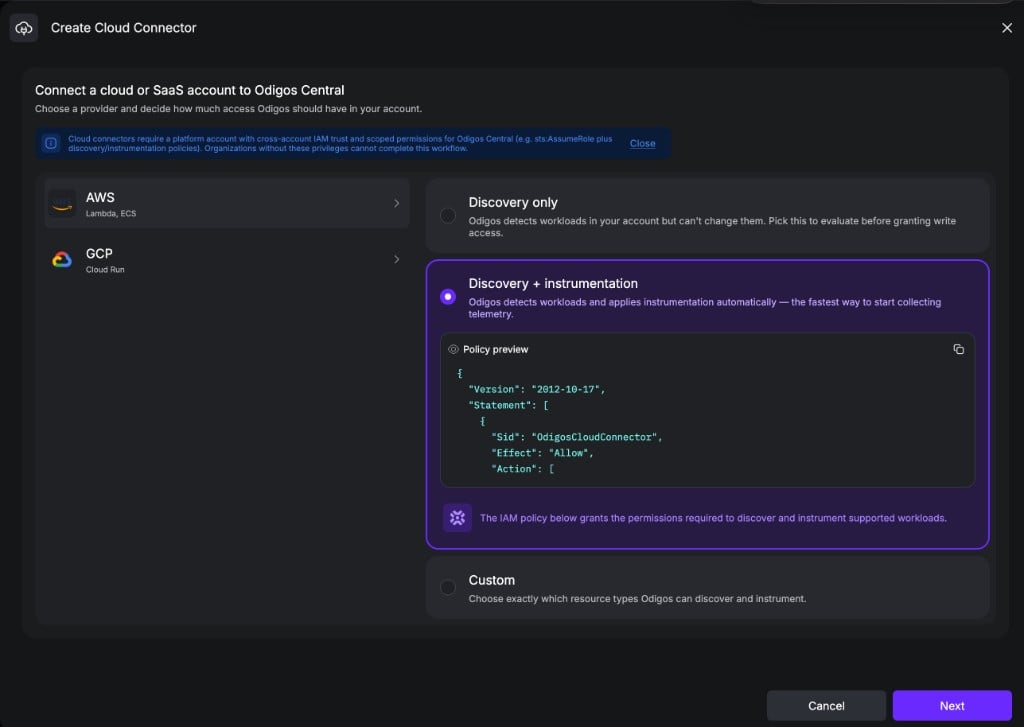
- Discovery only
- Discovery + instrumentation
- Custom
The connector can discover resources and instrument supported workloads. Prefer this for a full setup in one step.Includes all discovery actions, plus Odigos-managed instrumentation for Lambda and Fargate:
Odigos-managed instrumentation also requires an OTLP destination after the connector is online.
Use the policy preview as the source of truth for the permissions policy.
This keeps connector access scoped — not blanket account admin. See
You control the access scope.
3
Setup credentials
On the Setup credentials screen, apply the IAM policy from the previous step in your AWS account and enter the credentials Odigos will use.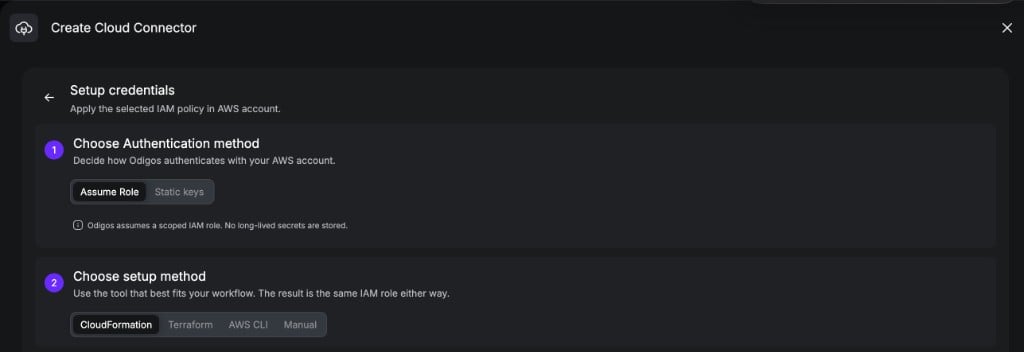
1. Choose authentication method
- Assume Role
- Static keys
Odigos assumes a scoped IAM role. Prefer this for production: you attach the permissions policy to the role, and Odigos does not rely on long-lived admin credentials in the connector.You still provide base access keys that are allowed to call 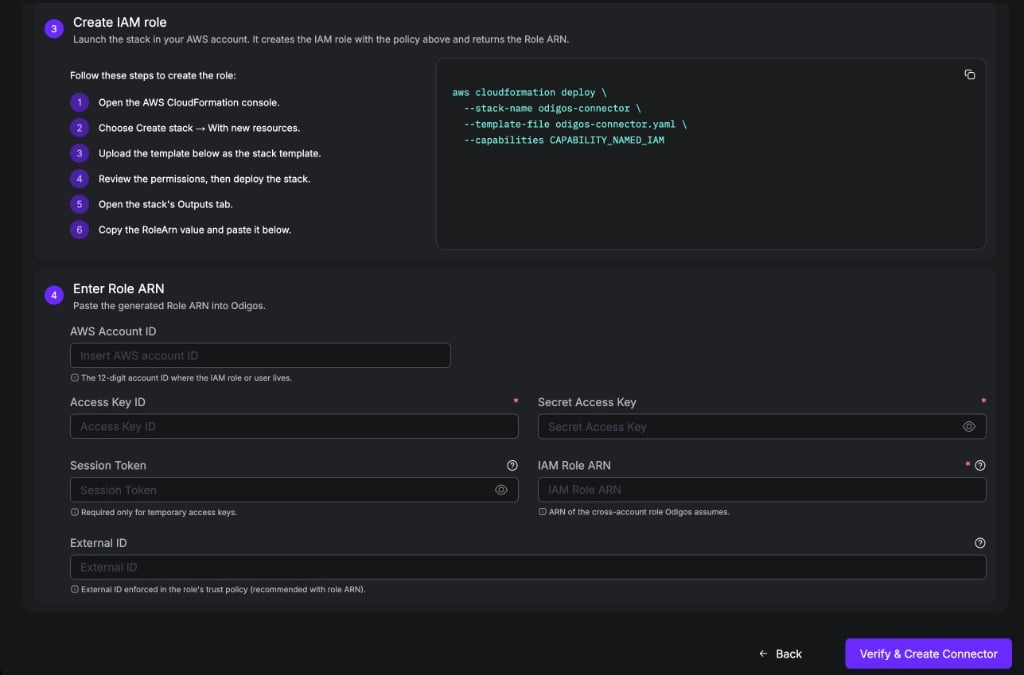
sts:AssumeRole on that role (plus the Role ARN and External ID).2. Choose setup method
Use the tool that best fits your workflow — CloudFormation, Terraform, AWS CLI, or Manual. Each path ends with the same role (trust policy + access-level permissions) and a Role ARN to paste back into Odigos.3. Create IAM role
Follow the instructions the UI shows for the method you picked, then copy the Role ARN.- CloudFormation
- Terraform
- AWS CLI
- Manual
- Open the CloudFormation instructions in the UI.
- Deploy the provided template (or stack) in the target AWS account.
- Confirm the stack created the IAM role with the UI trust policy and the permissions policy from the access level step.
- Copy the Role ARN from the stack outputs or the IAM console.
4. Enter Role ARN
Paste the values from the previous step into the form — account ID, base access keys, the Role ARN you copied, and the External ID from the UI trust policy.string
required
The 12-digit account ID where the IAM role lives.
string
required
Access key for an identity that can assume the role.
string
required
Secret access key for that identity.
string
Required only for temporary access keys.
string
required
ARN of the cross-account role Odigos assumes.
string
Must match the External ID in the role trust policy (shown in the UI, e.g.
odigos-connector).4
Verify and create
Click Verify & Create Connector. Central runs connection checks, then creates the credentials Secret and
OdigosCloudConnector resource when verification succeeds.Verification covers authentication and discovery permissions for the access
level you selected. For Discovery + instrumentation, also ensure the
instrumentation actions from the policy preview are on the role before you
create Sources.
5
Wait for Connected
After create succeeds, wait until the connector status is Connected and initial discovery has completed.
When the connector shows Connected, you can browse discovered workloads and
start instrumenting.
Next steps
Instrument workloads
Add an OTLP destination, create Sources for discovered Lambdas and Fargate services, and track instrumentation.
AWS Connector
Self-managed instrumentation, artifact preloading, and CDK/CloudFormation for every language.